Double-sided tissue box cover pattern

Quarantine has done some strange things to us all but one of the good things that has come from it is that people have gone back to sewing more and it’s exciting to see what people are creating.

Whether it be a creative project, mending or making practical items for use around the home, it’s been nice to see my favourite past time becoming more front and centre.

I’ve designed a double-sided tissue box cover pattern, so that you can make themed covers for all of your tissue boxes and if you want to make them extra useful make one side one holiday and the inside another. Or if you’re like me just make them all your favourite theme.

Materials

1 – 15.5″ x 10″ rectangle of your outside fabric
1 – 15.5″ x 10″ rectangle of your inside fabric
2 – 4.5″ x 5.5″ squares of your outside fabric
1m approx of piping cord size 2
2in strip of fabric for piping

Interfacing is optional – if you do decide to use interfacing cut one rectangle and two squares. Iron onto the wrong side of your outer fabric. I used a very lightweight fusible vilene (one suitable for stitcheries).

Assembly
Cut out the pieces as listed above. Iron on interfacing if you chose this option.

Place the two 15.5″ x 10″ rectangles right sides together.

Fold in half and press, find the centre (5″) and then draw a 1″ rectangle around it that measures 2.5″ either side of the centre mark. 5″ x 1″ box.

Stitch on the line, reversing at the start and stop points. Trim your threads.

Cut the centre of the box along the centre line and then angle out into each corner, careful not to cut your stitching.

Turn the fabric through to the right side.

Roll the seams out so they are flat and press.

Top-stitch around the edge with a co-ordinating thread. Seam allowance is up to you to choose – mine was 1/8″.

Trim the edges.

Find the centre of the edge of the fabric and finger press. Then find the centre of the side panels and line them up. Pin in position. Do the same for both the outer and inner fabrics.

Stitch a 1/4″ seam leaving the seam open at the start and stop 1/4″. See pencil mark. Make sure you keep the inner and outer fabrics apart.
 

Pin the 4.5″ x 5.5″ side sections to the main panel and finish the seams. You will have an overhang of approx 1″ of the main panel. Don’t worry about this yet. Pin all four sides of the inner fabric and finish the seams with a 1/4″ seam.

 
Repeat for the outer fabric.

Then trim the overhang of the main panel to match the side panels of both fabrics.

Fold up a small seam and press. Do this for both inner and outer fabrics.

Make piping – fold your 2in strip of fabric in half, lay the piping cord in the centre. Set your machine up with its piping foot and move the needle to the furthest right-hand position. Make the full length of the strip and don’t reverse at the start and stop as we will need to open it a bit to finish it off at the end.

Pin piping into position all the way around the edge, leaving a tail to finish the ends. Pin so that both the inner and outer fabrics butt up against the round edge of the piping.

Stitch the piping on, this time moving the needle to the left and removing pins as you go. If you need to ease any of the inner fabric aim it for the corners or where your piping joins. I had some slight movement due to my interfacing stretching.

When you get to the end, pull the piping cord out of the piping casing and trim away the excess cord. You want the piping cord to curve into the seam and flatten out a bit so you can fold the ends over each other and down into the seam. Line up the piping so the two ends overlap. Trim away the excess of the piping cord fabric. Finishing stitching and do a little reverse stitch. Trim your threads.


One reversible tissue box cover. Enjoy!

I’d love to see if you make any of these. Please feel free to share on Instagram with the hashtag #Frankiestissueboxes

Happy sewing!

Marni x


Welcome to 2019

Welcome to 2019 at Frankenstein’s Fabrics HQ!

This year has a lot already going on. Things that have been in the pipeline for a while and are finally coming together.

Classes:
I’m teaching a few different things this year including machine embroidery. It’s a specific project based on learning techniques and I will have more info on dates, prices etc towards the end of the month. To sign up for the mailing list click here.

Patterns:
Those of you who follow news in the crafting world may have seen the shake up that was announced by Craftsy a couple of weeks ago. Basically they decided to streamline their pattern platform and culled a lot of designers. I was one of them. To be honest it didn’t bother me because I had other avenues in place for selling and I was planning on moving away from Craftsy anyway. Many designers didn’t and they short notice has left many adrift.

So new to the website is a pattern only store. It’s a dropdown from the store button, under the header and will include free and paid for patterns. I am slowly transferring my designs there. They are all digital downloads. If you would like to purchase a hardcopy pattern please email me frankensteinsfabrics@hotmail.com with your address and what pattern you would like. Payment and post will be arranged. 

Website:
I will be tweaking the website throughout January, not only doing the pattern store but also getting rid of, changing and adding new things. I will be trying to blog more this year as well as now that some things have settled down I can focus again. The product store will change too, details to be advised.

Machine Quilting:
Machine quilting in 2018 was hectic. So in order for things to not get so crazy in 2019 I cannot stress enough that you book in your quilts with at least 6 weeks notice before you need it finished. Deposits are $50 – no exceptions. Bookings are welcome at any time of the year. Spaces do fill up so even if you haven’t finished the quilt yet please get in touch and secure a slot. Any questions please email me frankensteinsfabrics@hotmail.com or ring 0416 023 637.

My other job:
I am still working with the team at the Gosford Sewing Machine Centre. I am there Tuesday 10-3, Wednesday and Friday 10-4:30 and Saturday 9:30-12:30. If you need to see me in person this is the best way to do so. Please ring if you’re not sure I’ll be there. Frankenstein’s Fabrics stock is located in the shop as well.

Special Events:
This year there are a few special events that will be happening. Shows, charity days, one-off teaching days etc. If you would like to be kept in the loop for these notifications please sign up to the newsletter here.

Magazines:
As many of you know Express Publications shut down its remaining magazines in June last year. I had been a project contributor since 2007. It was sad to see it go this way after so many years, but things change and we must move forward. At this point in time I have no plans to contribute to magazines again. Mainly because when Express stopped publishing I was in the middle of some health issues and had decided to slow things down a little for myself. I am still working on my health and don’t necessarily wish to add that type of deadline stress back into my schedule just yet. I would consider it if asked and it would depend on the project.

January Special:
January is my birthday month so I decided that I shouldn’t be the only one getting a present! Stay tuned for a surprise a little later in the month.

That’s about all for now, so I hope you all had a lovely Christmas and New Year and that 2019 brings us all the things we wish for, especially some sewing time!

Marni x

Patterns…and a teeny rant…

Ever since I started sewing – and I’m talking way back when I was learning dressmaking at school – I have had a love/hate relationship with commercial patterns.

I threw in the towel with dressmaking after trying to make a pair of tailored culottes where the instructions told me to sew what essentially amounted to a 90degree seam, which had the unfortunate result of sewing one of the legs shut.

I gave up because it was too frustrating to tackle at the time. I do still own that pattern – buried somewhere in my sewing cupboard – however I highly doubt I will attempt it again. I would be more inclined to ask my work colleague, who has far more experience in dressmaking and bridal, for her help. Thanks Danielle!

But this tale of sewing woe has a point. It may not be pleasant for some of you out there to hear but a recent pattern purchase has made me see that I DO have to say something about it.

If you have ever written a pattern to sell, it NEEDS to be edited before you finalise your files for PDF’ing or printing.

Now I’m not talking just a spell check (that’s a start and you should be doing that anyway), I’m talking about having someone read-over your work so that a) it makes sense, b) flows properly and c) is helpful to those who will be reading it. It also needs to be formatted but I’ll get to that and a few other things later. First let’s tackle the main stuff that’s potentially driving away repeat customers and their money.

a) Making sense: This point should really speak for itself but unfortunately it isn’t always the case. This can be for a variety of reasons – for example; maybe you’re tired or in a rush to finish up the pattern – if you are tired or in a rush please just slow down or take a break. The pattern won’t run away and an hour less of sales while you take a nap or have a coffee WILL NOT HURT. Read through your pattern, read it out loud (to yourself or another person), have someone else read it, whack it into a program that reads aloud text like Text to Speech Reader and listen to the pattern being read out loud. By listening to your words, you will hear and pick up mistakes. Mistakes like repeated words – because you’ve typed too fast and doubled up or been distracted and typed appliqué three times – or things that just don’t sound right in your explanations, descriptions or methods.

Rule of thumb: Fresh eyes and ears help. Start by running your pattern through spell check and then go from there.

b) Flow: Flow and point a) go hand-in-hand, however flow will be more obvious, because what you have written is a set of instructions where it’s more important to get flow right so the progress of what is being made is done in the correct order. This is where many people rely on technical editors or pattern testers. Please don’t let this aspect slide – there is nothing worse than dealing with angry or upset customers because they can’t put together a project when the step-by-step instructions are in the wrong order.

Rule of thumb: Many pattern designers put a call out online for pattern testers – these are people who volunteer to make the pattern as it’s written and provide feedback. There are some who get paid and others who do it for fun and a free pattern. Who you use is your call.

c) Being helpful: This point walks a fine line between giving too much information and not enough to a customer. A pattern should not assume too much prior knowledge of the customer (basic sewing skills, terminology and product names for example) as this leaves out large swathes of information. A pattern should give a brief overview of the pattern’s needs (techniques, skills need, level of difficulty) so that the person making the project can then judge where they sit and what they will possibly need to search out on their own.

I have advised many of the people that I edit for to explain and then point people in the right direction – therefore giving reason for why something isn’t included and then pointing them to where to find such information. E.g. Binding – there are heaps of ways to bind a quilt. Find one that suits your style/taste/skill level and bind this quilt in the way you like, measurements for your binding fabric have included strips of up to 3in wide. Binding tutorials of all types can be found on blogs, YouTube and craft sites like Craftsy.

Rule of thumb: Give the customers the info they need. Don’t be overly wordy. By guiding them in the right direction you make them happy and they’ll come back because they know you can help.

Now for the nitty gritty…

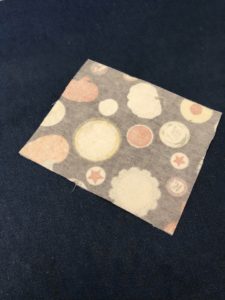
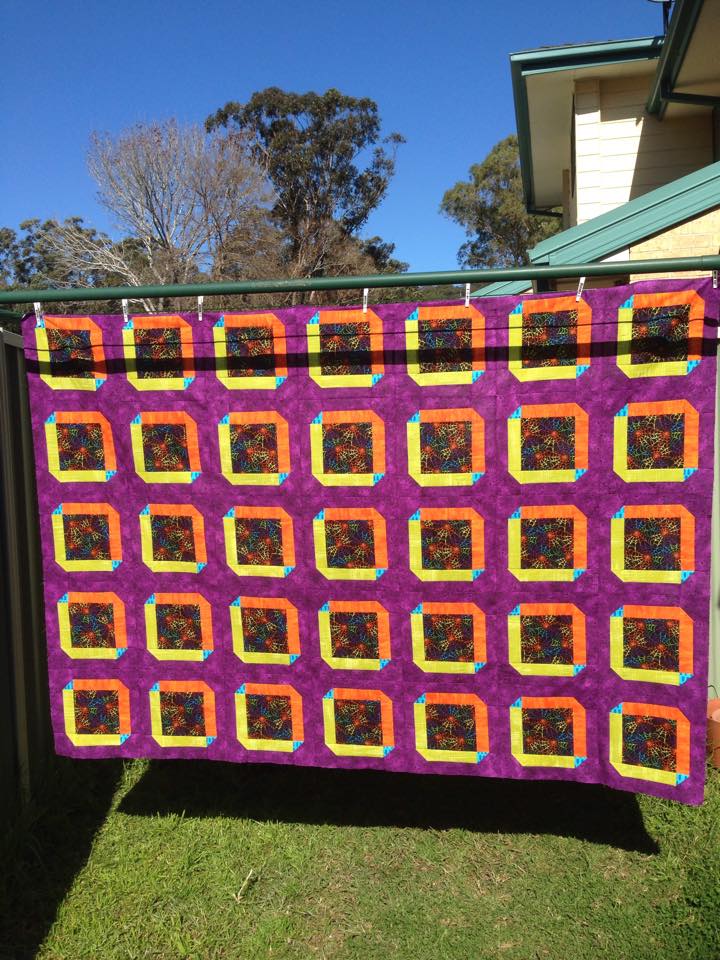
The pattern I purchased recently was from a well-known designer. The pattern cost almost $30 and basically was a few photos with captions and the appliqué templates. In my personal opinion – not worth the money. If I had no prior knowledge of appliqué or quilting I wouldn’t be able to make this pattern.

Now what I am about to say is all my opinion. I am happy to discuss and listen to others however this is me speaking from 10+ years of pattern writing for sale, magazine contributions and editing for other designers.

A pattern could/should include the following:

  1. A title – the name of your quilt, project or artwork
  2. An intro – a brief sentence or two about what it is/inspired you/technique or process explored
  3. Materials list
  4. Important notes – preparation for materials (washing), seam allowances, etc.
  5. Finished size of project if applicable (can also break down into block size for quilts if you want)
  6. Cutting instructions
  7. Preparation (making templates, tracing, ironing etc.)
  8. Assembly – can be broken down into block types or sections – such as sashings, inner and outer borders etc.
  9. Preparation for finishing the project (usually ironing, basting and sometimes embellishments)
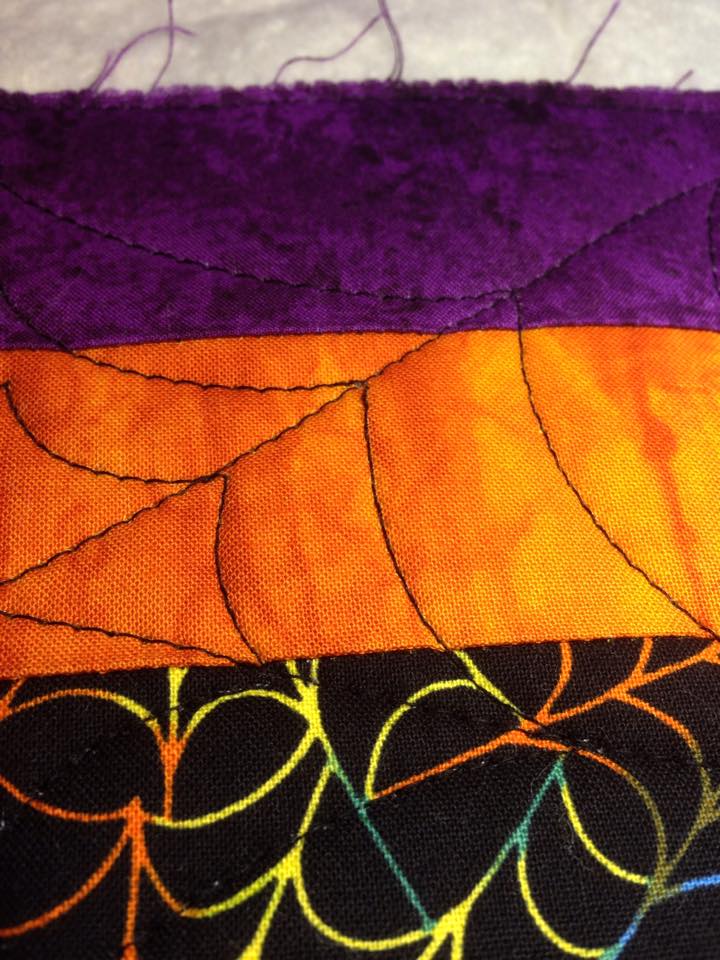
  10. Quilting – description of what quilting was done to the quilt, name of quilter if sent to a professional long-armer etc.
  11. Binding and label – how to bind the quilt, suggestions for what to write on the label
  12. Contact details of designer
  13. Blurb for copyright and licensing, terms and conditions for pattern usage

As you can see there is a lot of work that goes into a pattern. So, my question is why don’t patterns seem to get that final touch they deserve? That final gloss to make them as perfect as they can be?

I don’t have an answer for that except for maybe budget and time. Designers are always under pressure to put more patterns out there as fast as they can and many designers might just be a one-person show may not have the budget to spare to send their patterns out for editing.

Now back to the other things I mentioned earlier – formatting, standard text and unusual instances.

Formatting:  Is basically setting out the text/images/diagrams so that your pattern is easy to read and follow. Pick a typeface (font) and size that are clear and easy to read (no Curlz MT please or heaven forbid Comic Sans!!). Make sure headings are clear, maybe you would like them a size larger than the regular text or bold them so they stand out. Sub-headings look good in italics. Ensure lists are numbered or use bullet points or dashes. You can change the colours of the text but keep in mind what it will look like if printed out – pale colours will fade out on white paper for example. Keep regular text black and if needed highlight important points in a strong colour like red (like you need to cut something 6 times). Centre images and diagrams, keep text to the left and for any tables you might have adjust as needed but keep in line with the other formatting you have done. Consistency is key.

Standard text: I have somewhere around 450 patterns that I have typed up over the years and standard text is my time saver trick. I have a folder on my computer with snippets of text that I use all the time. Things that don’t change much or a description that I’ve gotten to a point that I’m happy with the flow of. For example; binding instructions remain the same except I change the fabric description and the number of strips used. Particular blocks like Half Square Triangles – I have text saved for it and once again just change the fabric descriptions, then I change the size of the pieces cut.

Standard text is also useful for things like your contact information, copyright and licensing and your terms and conditions for pattern usage. Once you have these down pat, save the text and re-use for each and every pattern.

Unusual instances: This is the section where I am going to put a few rules that you might not know. Numbers are the most common thing we use in writing patterns – sizes for tools, materials lists, cutting instructions etc. However, there is a formatting rule for numbers that you need to pay attention to as it will prevent confusion.

  • Numbers 1-9 are written as numerals
  • Numbers ten and up are written as words (ten, thirteen, twenty etc.)

You can also write them – “Lay out nine (9) squares…” to help avoid confusion within the text itself however in cutting instructions you need to be extra clear. I like to use the below example –

Cutting instructions –

From the pink floral print cut –
– Seven, 6in x 4in rectangles

The other thing with patterns (mainly quilting ones) is that here in Australia we use both metric and imperial measurements. So, for the ease of my customers when they go shopping, my materials list gives them both. Metric so they can tell the shop assistant what they want and imperial so they know what it is when they start cutting from the instructions.

Materials list –

30cm (12in) pink floral print

————————————————————————————————————————-

I am putting this post out now because this is something that I am passionate about and because I see the other side of it… I teach a class, it’s my most in demand class, called BYO project. It’s aim – for students to bring along a kit or pattern they have purchased from a designer or craft store and despair at making because they cannot decipher the instructions. I decipher the patterns for them and guide them through what should have been written there in the first place.

I have been editing patterns for pattern designers for a few years now and the most common themes I’ve been told are things like they are saving time dealing with people complaining about mistakes answering emails with corrections and chasing reprints. They are also starting to see customers returning, more in sales and feeling like their patterns are more complete.

I have spoken in several groups before about editing patterns and 98% are resistant because they don’t want to pay for the service and they think their work is fine as it is. I can tell you that it’s nigh on impossible to find a perfect document. It can always be better. Small changes can make a big difference.

So to that effect, to those out there that think they don’t need an editing service performed on their patterns… pick one and send it to me as a Word doc, I’ll edit it for FREE and send it back to you, sending you two files – one with tracking (all the changes I will make and suggest to you to make) and a clean file (which will be a final copy of all the changes I make) – so you can see the difference, see how it is done and maybe in time, learn what to watch out for in your own writing.

I will be only accepting the first 6 people to comment. When I have replied to you please email your pattern to frankensteinsfabrics@hotmail.com

If you have any questions please feel free to email me and ask.

Marni x


Why hello there, 2016!

As we waved goodbye to 2015 last night, like all new years celebrations before it, many of us turned introspective. Minds turning towards the potential of the new year, whether it be personal or for business.

This year things are changing here at FF HQ. In fact they started changing a little while ago but the big jump into the new things is happening NOW.

Firstly – many of you know I am teaching. You might have been to a class or spoken with me about coming to one when you’re ready. This year is chock-a-block FULL of classes. Click here to sign up for class news. I’m running basic blocks for those who want to get started, project classes where we tackle specific quilts or designs, colour theory for those who are struggling with choosing fabrics and one-on-one classes for those who are determined to get to the bottom of the UFO box.

I am also in the process of designing a new range of quilts and unlike many of my previous designs these will not be headed to the magazines. These will only be able to be purchased through my online store. I’m returning to my designing and writing roots this year because that’s what makes me happy.

This year Dawn Lewis from DawnLewisImagery and I will be utilising a new video style platform in order to bring tutorials and unprecedented access to us in an interactive online session. This will enable you to sit in on a Skype-style video call and talk to us live online and with other customers. If you don’t want to be ‘seen’ on the video call then you are also able to jump in the question section and ask us anything you like. All you need to get started is a Twitter account! I have a session scheduled on the 20th of January at 10:30am if you’d like to join us  and see what it’s like. For those who aren’t quite ready for it you can watch online but you won’t be able to ask questions or join in live.

I’m also working on a batch of videos – reworking basic skills and techniques and getting a good bank of videos we can all refer back too whenever we need a refresher or if you want to encourage a friend to join in on this hobby. If there’s something specific you’d like help with please let me know.

I am still contributing to the magazines this year as well – you will continue to see my projects in Handmade and Patchwork & Stitching magazines as well as a few other projects elsewhere, that you’ll see later on in the year.

I’m re-working the shopping cart on this site as I am no longer selling fabrics online, most of the products will be digital and instant download (no shipping!!) as well as copies of Mollie Makes and hard copies of vouchers if people need them sent out.

Machine quilting bookings are filling up. January is full, February – April have some spaces available. Please book ASAP to ensure you get the slot needed for your quilt. I will be introducing a loyalty card system for machine quilting (retrospectively adding quilt jobs), with discounts and incentives for customers.

Currently though I’m having a bit of downtime as January is full of some crazy things that are happening. My birthday, a few health things I need to take care of and my cat requires some surgery so I will be around but if you  miss me I’ll get back to you all when I can. I am working at The Gosford Sewing Machine Centre – usually Tuesdays, Fridays and Saturdays but if you need to see me specifically please give me a call.

I hope everyone has had a lovely festive season and is now ready for bigger and brighter things in 2016. I also hope that you join me this year and continue to support Frankenstein’s Fabrics and the new direction that we are headed in.

Happy Quilting!
Marni x

2015-11-07 21.03.41

Cushion Cut

A few weeks ago Caroline of Nightingale Quilts put a call out for pattern testers.

Now those of you who know my backstory know that I’ve worked for some of the craft magazines and that part of what I did was work on instructions – so naturally I jumped at the chance!

Caroline has designed a quilt that was quick, efficient and stunning. As you know I’m not one to work to someone else’s pattern as I’m usually designing my own. It is rare that I purchase a pattern or follow along with someone else’s creative process but something about this pattern drew me in.

I made my version of Cushion Cut using a selection of Halloween prints from my stash. Plus a few newer additions. 🙂
11912868_10153515583185390_1826834101_n 11897053_10153515583110390_999012406_n

As I finished cutting I decided to not use the yellow.

I pieced some sections while I was at the shop and packed it all in a tub ready to go when I got home.

11911933_10153515583040390_1252267811_n

And then I set myself up for a sewing session!

11917305_10153515582910390_426899852_n 11944637_10153515582945390_1186626688_n

I am a fast sewer and I also have no obligations (read: no kids) so for me it was a case of sit and sew until it was done. I timed myself to see roughly how long it would take (curious) and it was just over 15 hours to cut and piece. Quilting took me about 4 days (not solidly working on it, in and around other things) and binding took me an hour.
This quilt is a fabulous all rounder project – good for those just starting out, a quick one for those with more experience and one that works in all fabric styles for the perfect gift.

Mine is currently on my bed as it will be the quilt that I use in this warmer weather and the orange matches my bedroom curtains perfectly!

11908204_10153515582720390_222525446_n 11913309_10153515582630390_1805270824_n

11912983_10153515582770390_1054791012_n
I decided that I would quilt mine in an allover spiderweb pantograph from Dave Hudson.
11909767_10153515582695390_300829167_n 11940447_10153515582580390_1825817402_n

My backing fabric is called Scary Chandelier from Michael Miller. I have some in white for sale if anyone is interested (PM, email or ring for details).

I loved making this quilt. So much that I put aside pretty much everything else I was working on to make it. I felt rejuvenated after making it – taking the time out from my usual schedule to pattern test for Caroline helped me re-focus on my own work.
*drumroll*

My finished version of Cushion Cut!

My finished Cushion Cut quilt, shot at the Haven at Terrigal, NSW

My finished Cushion Cut quilt, shot at the Haven at Terrigal, NSW

So what’s next?

Well…. Caroline has graciously given all the pattern testers a FREE PDF copy of her pattern to give away to one of our followers. To enter simply head over to my IG and like the picture, tag a friend and I will draw one winner at random tomorrow evening (30th August AEST). If you don’t have IG please comment below on this blog post.

And to sweeten the deal – anyone who makes this quilt (either pattern winners or those who buy the pattern from Caroline’s Craftsy store) and books in to have their quilt top machine quilted by me will receive a 10% discount on their quilting costs (does not include backing, wadding, thread or postage). This is open to Australian residents only as the postage from overseas will not be worth the hassle. 🙁

Bookings must be made and paid between 1st December 2015 and 31st May 2016. You can book during that time but bookings can be set for later on in 2016 if you so choose. Quilts will be quilted in line with the requirements set out here on my machine quilting page. Any questions please do not hesitate to ask. 🙂

BEST PART!

10% of every cushion cut quilt top sent to me for machine quilting will be donated to Caroline to help her care for her rescue flying foxes and bats. You can read more about what she does here.

I’ll be back with a list of the other testers so you can go and check out their designs!

Happy Quilting,

Marni x


Scrap Busting Solutions #3 – Choosing a pattern

Once you’ve sorted your scrap stash, it’s time to choose what pattern you’ll stitch it into.

There are a few things to look out for when deciding on what you want to sew, the first and most important is what size are your scraps?

Because the whole point of doing this is to not need to go out and buy more fabric. That won’t help the situation that we’re trying to fix here.

So the aim is look for patterns that use pieces that are the same size or smaller than what is in your stash – remember how we spoke about sorting into size as an option for how to divvy up the scraps – then you can work out what scarps to use and what to save for the next quilt (because there will be one).

I like to peruse Pinterest for ideas for scrap quilts because there are so many options. Pinterest is a great way to utilise the resources of the internet BUT be very careful about infringing on someone else’s intellectual property, copyright and trademarking. When you start looking for ideas make sure you follow it all the way back to the original source/designer/quilter and if you really love what they do there are a few options –

1. Buy the pattern from them (if there is one).

2. Contact them and ask for permission to use their design, explain what you are doing and what the end use will be; personal quilt, quilt for sale, charity donation etc. Then make sure that what you are doing is okay with them. I always like to get this in writing.

I will speak in more detail about copyright, trademarking and intellectual property at a later date, but basically when in doubt about a pattern or design ask and if you can’t find the original designer don’t use it.

Often with scrap quilts you will see that the scraps are used with a solid fabric in a neutral colour (white, cream, grey, black etc). This is a great way to showcase your scraps and downplay the busy-ness that comes with lots of fabrics that may not necessarily match or come from the same sorts of fabric ranges.

Here are some quilts that I like, that I found via Pinterest, that you could make using scraps (this doesn’t mean that they were designed this way) –

http://www.pinterest.com/pin/246994360786475452/

http://www.pinterest.com/pin/256564509996618993/

http://www.pinterest.com/pin/172192385724753266/

http://www.pinterest.com/pin/34691859602370021/

http://www.pinterest.com/pin/30751209925435163/

http://www.pinterest.com/pin/128915608058993940/

If you prefer hand-sewing you can use your scraps to do some English Paper Piecing – hexagons, apple cores, clam shells etc.

Just back to the copyright for a moment –

If you choose to use one of my designs:

1. All of the quilt designs belong to me. I am happy for you to use them (the designs, not the photos) if you ask permission or purchase the pattern from me. Please send me an email: frankensteinsfabrics@hotmail.com. You need to ask in writing so we are both covered for any potential issues. If you will be selling items made from my patterns I ask that you give credit to me in the form of FB link, email address, shop name etc – whether it’s noted down on the quilts label or the sign used to sell the quilt and on any info supplied to the person/s who purchase the quilt.

2. The patterns that you purchase from me (in hardcopy or PDF format) are for personal use. I ask that you do not use them as teaching aids (unless all students in the class purchase the patterns – happy to do group discount), I ask that you do not photocopy/email and share my work.

If you have any questions about scrap quilts or anything in this blog post please don’t hesitate to ask.


Marni x