Over the last little while, maybe 6 months all up, I’ve had this thought… not quite an intrusive thought but an invasive one to say the least, of hiring a skip bin and throwing out everything.
Of course that’s impossible and not practical at all but the thought still lingers in my brain and it is very tempting.
So to assuage the thought and calm it’s annoying voice I have been working on streamlining things around the house again. Mum and I started some lists for major house and garden stuff, with a few extras like going back to meal planning and stuff like that but what I really want to focus on is the craft spaces.
I have two spaces in the house – the garage which is the quilting studio + shop stock and general house/garden storage area and the sewing room upstairs which has all my personal sewing related bits and bobs in it.
These two spaces operate differently and need somewhat different approaches whilst at the same time needing pretty parallel methods of attack.
I cannot at this point in time do anything about the house and garden stuff in the garage space. I don’t have the time, energy or room, or to be fair the mental capacity to deal with some of the items that are there (long story).
So ignoring them I can focus on the shop and studio space. The stock is neat and tidy because that’s how I keep things anyway to keep inventory under control for any mail orders that come in. The charity quilts and quilts for sale are stored and neat. The wadding and other machine quilting accessories are fine too.
What’s not fine is the bags upon bags of wadding and fabric scraps that need sorting, the landing space for items that are due to leave the house (charity donations, things to sell on FB marketplace etc) and the odd random things that need a large enough home that are stored under the quilting machine.
For now though I have put a pin in the garage space. It’s clean and organised if somewhat cluttered and most importantly it is functional, which is all that matters.
However, the sewing room upstairs is a whole other level of mental clutter. Like many of you I have cobbled together furniture and storage for my craft space over the years. None of it matches, none of it really works and to be fair the room needs a change. To what I don’t know, but the itch to rearrange everything is almost as bad as the skip bin thought.
I spend a lot of time in this room and if any of you know me in person you would know that I absolutely despise inefficiency, double and triple handling of things and unfortunately that is where I find myself. Moving things from flat surface to flat surface in an effort to function as best I can.
I hate it and it has to change.
So recently I started cleaning out things box by tub and seeing what I can throw out. A little craft space Feng Shui if you will.
I started with the UFO tubs – going through them and making sure that the projects were all together. Then I moved onto the haberdashery, yarn and thread boxes I keep just inside the door to the room. They were pretty organised but I still managed to cull some stuff.
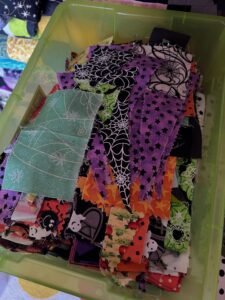
And then I found the box of Halloween scraps. And then I remembered the tub of Halloween scraps that was under the desk.
So the last day and a half I spent ironing and cutting and throwing out all the scraps in these two boxes. I now have a tub of pieces too good to throw out but not big enough for a proper project ready for a crazy patch, QAYG type project. I also have a bag of precut wadding squares perfect for this so this will use up two bundles of scraps.
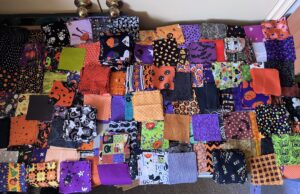
Everything that was bigger than 4″ square got cut into 4″ squares and I now have a tub of 1478 squares ready for a project when I don’t feel like thinking too hard but want to sew.
At some point I will get bored with all this cleaning and stop until the next wave of motivation hits but for now it’s helping me cope with other things going on. A nice productive distraction of sorts.