Afternoon all,
Here we are at block #3 of the Block of the Month.
Block #2 was emailed out as the beginning of last month was very hectic indeed. But you can get it here.
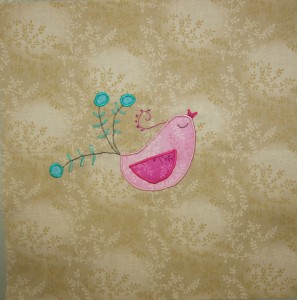
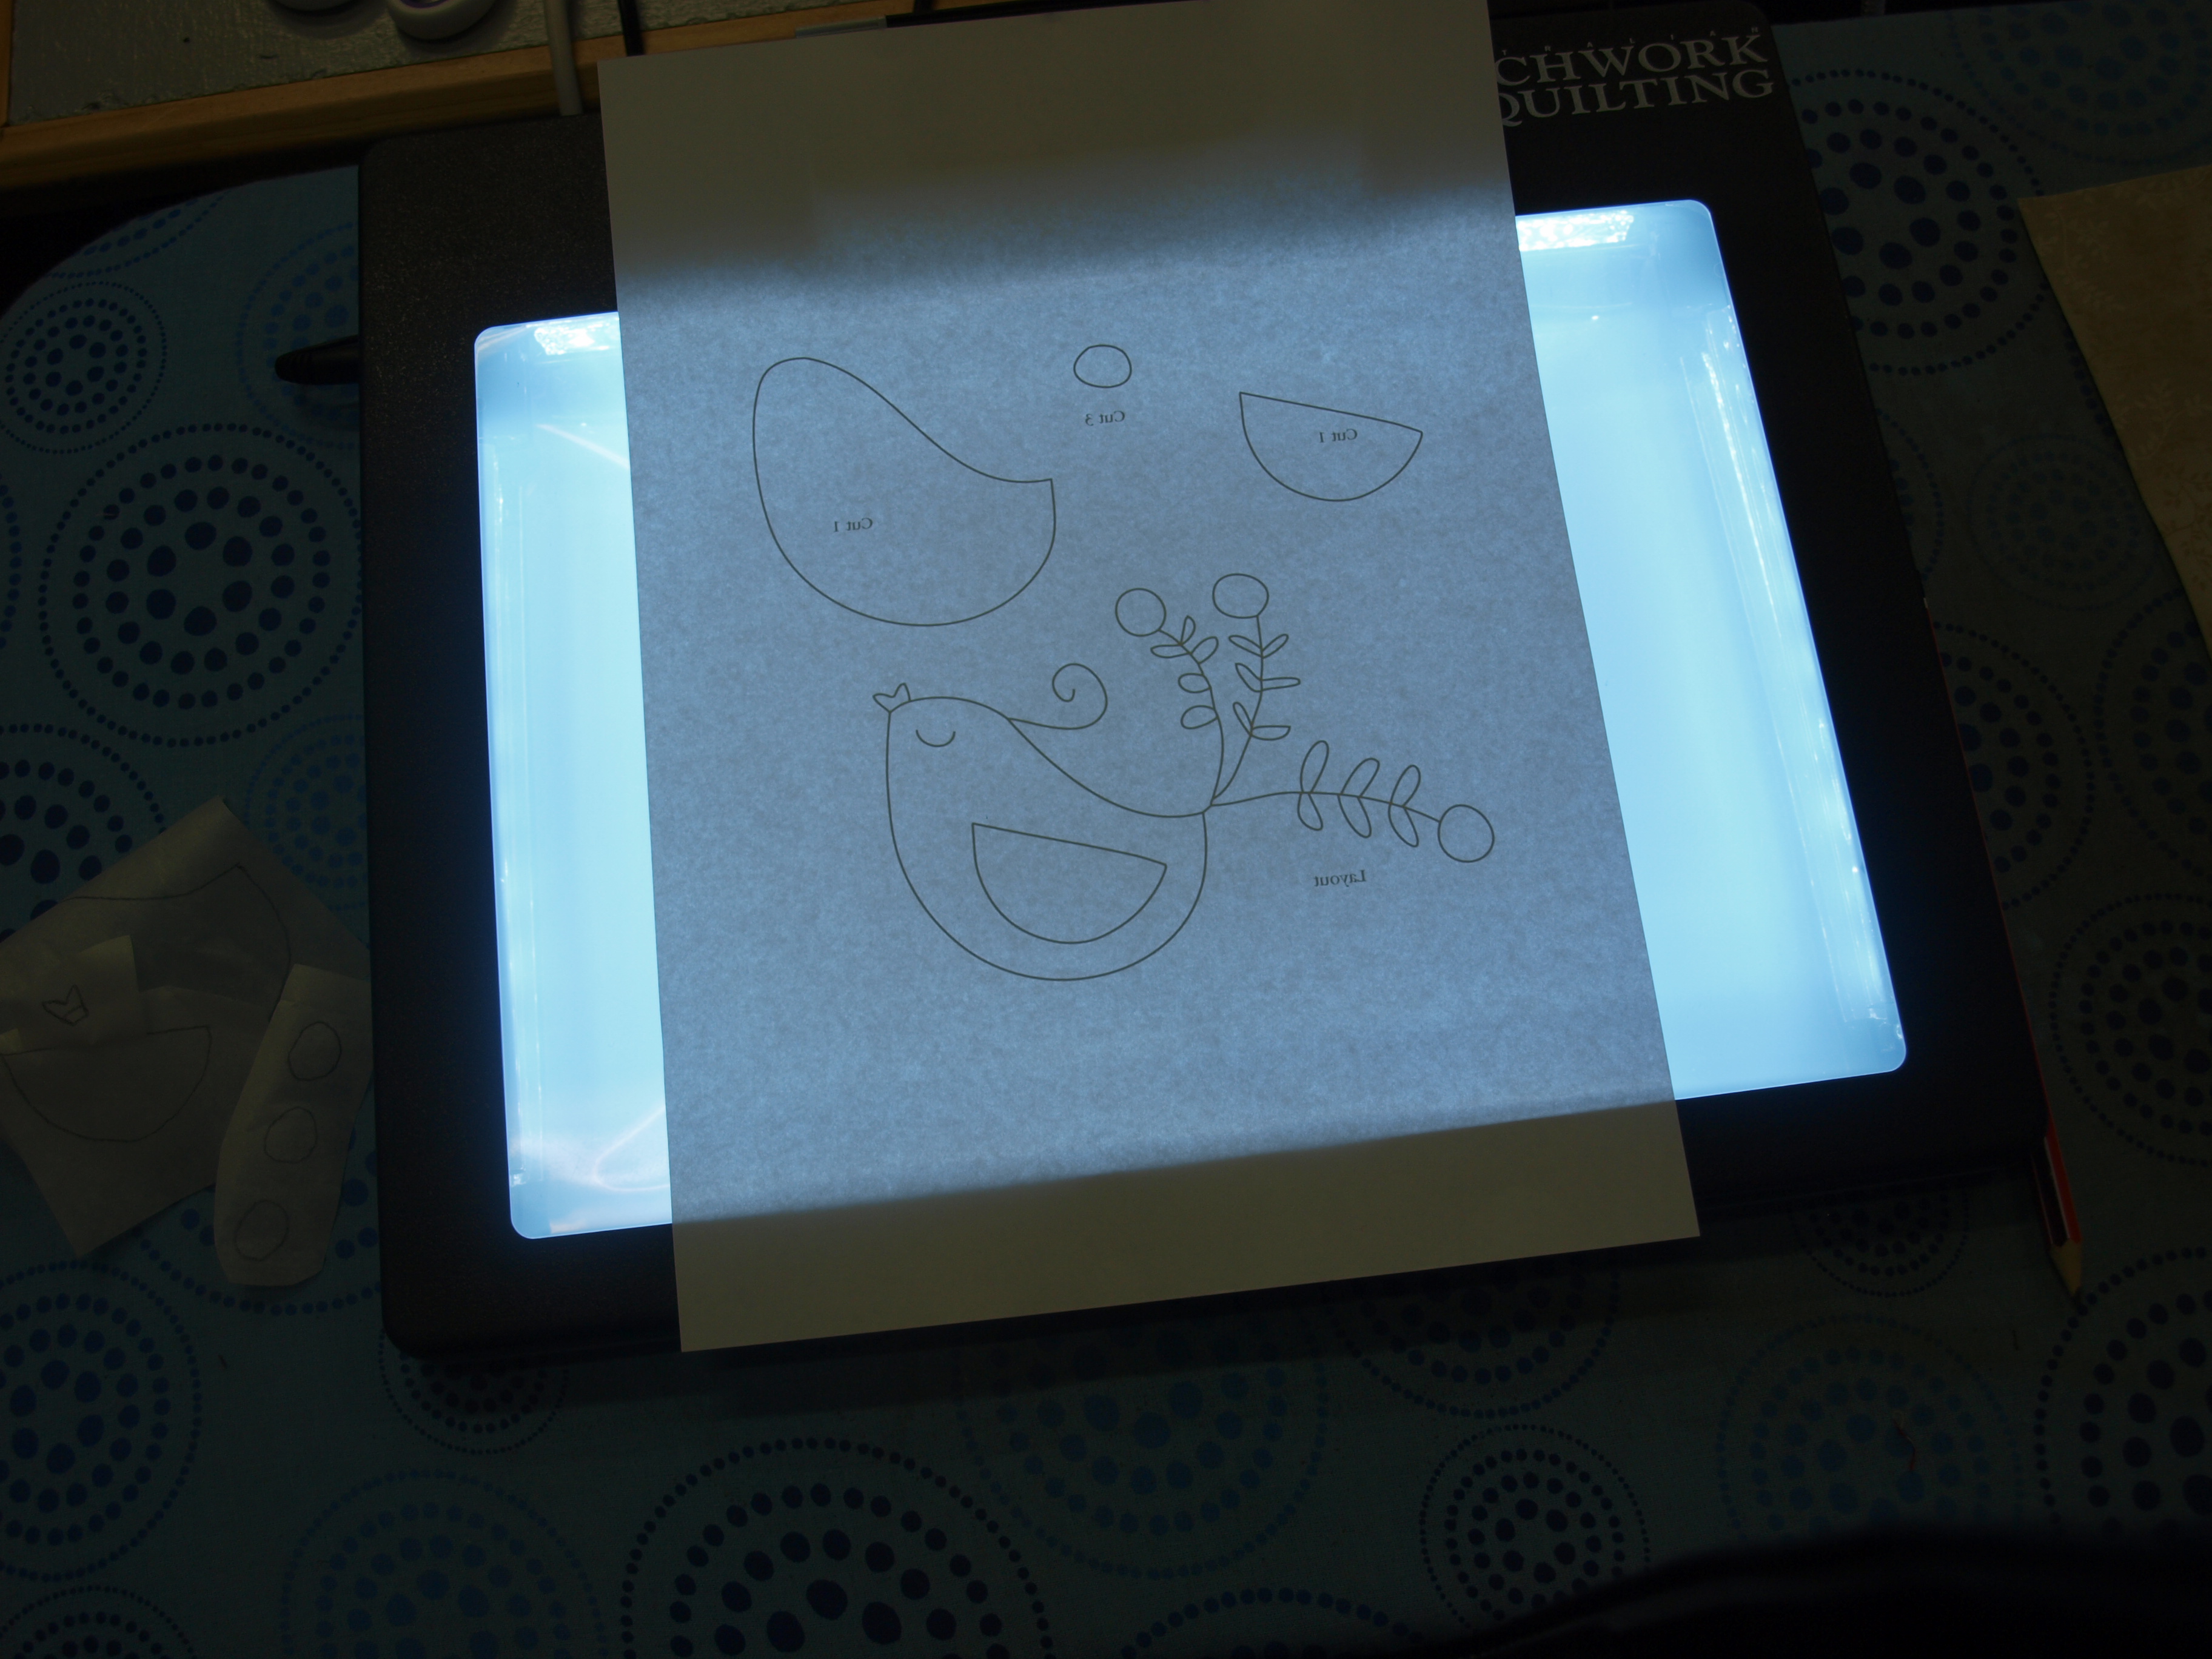
Block #3 is a sweet little bird, get the PDF here.
To make block #3 you need to use the same techniques as used in blocks #1 and #2 then continue as follows…
Note: Depending on which way you want your bird to face – facing left trace right side up, facing right trace from wrong side of template.
When stitching the beak as it is such a tiny appliqué shape make sure you set your zigzag stitch on your machine smaller. Also when cutting it out sometimes it helps to add a little extra to the edge that will sit underneath the bird’s body.
After you have stitched around the body, wing, beak and tail pieces tear away the stitch-n-tear from the back of the block. Place the block back over the template and trace the tail/feathers, head swirl and eye with a removable marking pen. I have used a Frixion iron away pen in orange.
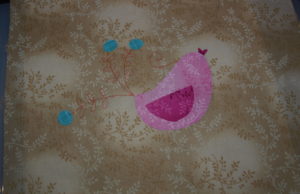
Thread your hand needle with two strands of DMC thread (whatever colour you want) and back-stitch the tail feather centre lines and the bird’s eye. Lazy-Daisy stitch the feathers on the tail in a second colour. Pick a third colour and back-stitch the head swirl.
For those who need a reminder of the stitches used, click here for a link to a free downloadable guide to embroidery stitches.
I’ll upload a photo of the finished block in the morning as I’m just putting the finishing touches on my little bird and need to take some pictures in better light.
Marni x
EDIT***
Here is the photo of the finished block. I added a few French Knots along the edge of the head swirl because I felt this little bird needed a bit more of a flourish.