I’ve been a bad blogger….

*waves*

So I’ve been a little lost over in the world of Instagram since before Christmas, I haven’t been blogging, I kind of hid from the world over New Year and then I hit the big 3-0 and I’m way behind where I should be. Schedule schmedule.

So MerryChristmasHappyNewYearHappyAustraliaDay etc….

Frankenstein’s Fabrics HQ has been a tad adrift since early December when I lost my sew-jo. I wasn’t feeling up to anything much, and I was pretty much giving myself permission to wallow in some self pity. I was exhausted and not feeling much of anything emotionally. Partly because that time of year is my kryptonite and gets me down anyway but the ramped up social expectation drives me crazy and I just want to hibernate with my laptop, sewing machine and my wi-fi.

BUT

Now that craziness is past and the rest of the world has chuffed the kids back to school, normal viewing can commence.

So to get things back on track and the new year bringing new things and exciting adventures in the world of me (not being narcissistic just really into my plans for this year) here’s a quick round-up of the important things you’ll need to know for this first quarter of the year.

1. I started a Facebook group, which will have one free quilting patten released each month for the whole year. This is in order to get people motivated and inspired. The group is 40+ strong at the moment and we’d love for you to join us. We are also using the group to help each other whittle down that sneaky tub of UFOs, ask questions, get help with troublesome projects/techniques and anything in between.

2. Mum is stitching away nicely at her quilt (which was meant for winter last year but life got in the way). It’s about to have the last border popped on and then it will be ready for quilting. There will be proper detailed blog posts about this as she proceeds and you’ll be able to get the instructions if you would like to make this quilt as well.

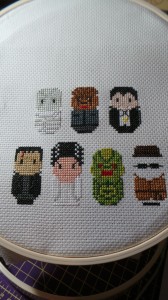
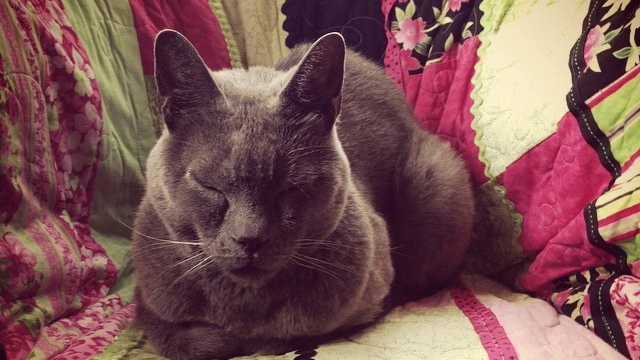
3. I am loving Instagram! It is so much more rewarding and friendly than Facebook,  I think because it’s more instantaneous and visual which is a must for all of us creative types. Please feel free to follow me if you have an account. The most amazing thing about it is the swaps that I have signed up for – hoops, bags and mini quilts everywhere! I’m met lovely people who are like-minded as well as starting my own mini quilt swap. I dived right in and #kittenmqs2015 was the result – inspired by Vladimir.

10644943_10152668009245390_5000703811634144244_n

4. Charity quilting – Quilting for charity is a unique and humbling experience. At the moment I have 8 quilts pending for BlanketLovez, I’m also quilting two very special quilts for the families of the Lindt Cafe victims. This has been organised by Molli Sparkles and the team of Glitterati who have donated hashtag blocks from all around the world.

5. In an effort to get things back on track for my poor body and my health, mum and I took up Tai Chi last year and have managed to stick with it into 2015. If you are on the central coast and would like to come to classes head to Central Coast Yang Tai Chi for more info. Steve is an excellent teacher.

6. Lastly, things haven’t quite panned out the way I wanted them too with classes in the new year. I was waiting on some information to come my way but it wasn’t to be and now the schedule is up in the air again. I will be sending out a newsletter with class info mid-February so if you would like to know what’s happening sign up here.

Anyways, I think that catches everything up for now.

I’m off to bed and will be back later with more happenings at FF HQ.

Happy quilting!

Marni x

Yippee!!

I finally finished my Classic Horror Monster cross-stitch!!

I’m really bad at finishing cross-stitches so this is a personal best for me…all in the one year!

Top Row: The Mummy, Wolfman, Dracula

Bottom Row: Frankenstein’s Monster, The Bride of Frankenstein, The Creature from the Black Lagoon, The Invisible Man.

20140619_081636

I’ve also been working on some English Paper Piecing. I’m doing some clamshells at the moment and also working on a video for hexagons.

20140618_120410

This quilt – that this first clamshell block will go into – will take me a while, as I am determined to do it by hand as you are meant to and I’m a very slow hand sewer. If you’d like to follow along just bookmark this post, but I’m warning you now that it will be ages in between updates, I’m that slow a hand sewer.

I’ll be using up all of my halloween scraps as I love the vibrant colours and I hate waste. And a girl can never have too many halloween quilts. 🙂

As of tomorrow the shop move goes into full swing so there might not be a post for a little while. Excited to have this all over with as I hate packing.

I have several sales happening as well at the moment – you’ll need to check out my Facebook page and Hand-made store for all the goodies.

As always if you have any questions… please ask.

Marni x


After a market…

I’m sitting here in bed typing on the very tiny bluetooth keyboard for my iPad thinking about all the things that happened today. It’s just before midnight and even though going to a market today was physically exhausting I am WIDE awake.

So I thought I might share with you what happens after a market –

After I have packed the truck at the venue, Mum and I drive home. We unload, collapse on the lounge with a cup of tea and just relax for a bit. Later on though my mind is filled with all the things that happened during the day – who I spoke to, what it was about, things I can change on the stall, things I can do next time, what I can bring etc.

Each market gives me its own unique feedback – sometimes that feedback comes in words from customers or event organisers, sometimes its as simple as monitoring what sells best/worst/in the middle – which means that for the next market I can try a different set of products, displays, set up and even to how I pack the truck. I try to maintain a balance between the efficiency of packing and unloading the truck  (how many trips back and forth from the truck to the location of my stall) and what the customers would like to buy. Sometimes I get it spot on, sometimes I miss a few things, but that is why markets are so important to small businesses like mine.

I’m an online business selling an item that is tactile – which makes it hard to sell based on quality because as a customer you can’t feel the texture, see the brightness of a print or stack bolts in different sequences to see if your idea will work – but as a business owner I am relying on you to trust me about that quality, which you should because I am one of you. I’ve been there, starting from my first quilt (front was good but oh my the backing!), confused by all the tools and gadgets, even more confused by the maths (what are these inch things?) and not really understanding the accuracy of what I was doing.

You need to trust me to select the fabrics and products, trust that I would only stock good quality or things that I use myself. Which is exactly what I do.

Back to the markets…

I do markets to advertise, mingle and engage with my audience in a way that I can’t as an online business. I do the markets to help make the lack of a physical shop less an inconvenience to my customers – so that quilts tops can be dropped off for quilting, picked up once they are quilted, local mail orders can be picked up and so that I get some human contact. I’m in a studio all day on my own and it can make you a little crazy, all that solitude. I do enjoy it but it can be hard sometimes.

So after today’s fun at the Destash Market (my own stuff not the shop’s) I have some really fun things coming to the next market and I hope that if you do come to a market that I’m at that you do pop in and say hi.

I’m still not tired so I guess it’s more work for me until I feel sleepy, can’t do any sewing this late as mum and dad are already asleep. So is the cat…on my feet…

Night!

Marni x

Washing, Ironing and Cutting

After washing all of your fabrics, iron and starch them.

20140517_042147

This is how much fraying and threads that happened when we washed these homespuns, we lost just under 3/4in on this green fabric and the others lost about the same but none more than an inch. This is why I urge you to consider buying extra fabric to save you the grief and hassle of going back and buying more fabric.

20140517_042220

Watch this video for using starch.

20140517_043016

Fold your fabrics in half with wrong sides together, selvedges aligned. You may need to allow the fabric to dictate to you where the fold is, which may pull the selvedges out of line but they will be cut off so don’t worry too much. Your selvedges will not match up – in the photo below you can see the teal fabric selvedges are way off – this is due to two things, washing and grain line. When we washed our fabrics they have shrunk, we removed the sizing that was keeping them nice for the shelves in the shop and the grain line has been ‘relaxed’. By adjusting the position of the selvedge when folding your fabric in half for cutting you will get a much better and more natural grain line and it will be straighter.

20140521_103211

Trim off the frayed edge to straighten up the fabric. If you are left-handed you can continue cutting as the fabric is laid out in the right position for you. Right-handers turn the fabric’s newly straight edge to the left-hand side of your board and then continue cutting.

20140517_043034 20140517_043112

From your five fabrics (50cm pieces of homespun in the materials list) cut three 2 1/2in strips.

20140517_043538 20140517_043650

Note: the remaining fabric will be used to piece the backing for Mum’s quilt, you can choose to do the same if you wish.

Set up your sewing machine with the neutral thread for piecing, the 1/4in foot and a straight stitch that is the average for your machine – check your manual for tips on this. My Janome likes a stitch width of 5.5 and a length of 2.

Piece the strips together in the sequence of your choice. This is the sequence we have chosen for mum. There is reason behind it, it’s not just random. If you paint put your mind into that way of thinking, but I will explain.

1. Green is on this end because it has a yellow base colour and is essentially the odd one out in this range of colours.

2. Teal is next because it is made up of blue and green so it can sit nicely next to green to help tie it into the block.

3. The blue is in the middle as it is the darkest fabric and will draw the eye in, but it is also there because it is blue – the teal has blue in it so they can sit next to each other, and the blue also is used in making the colour for the next strip so it is tying the two sides of this block together.

4. Purple has a red base (mix red and blue together to make purple) and so this is why it’s next to the blue.

5. Brown is often classed as a red based colour so it belongs next to the purple for this reason. It is also technically an odd one out so it is also balancing the green’s oddness on the other side.

20140522_004753

Piecing

Start with the green strip and place it on top of the teal strip. Pin if you feel you need to hold the strips together.

Note: I like to sew my strips together so that as they are being joined so that they are off to the left side of the machine – this keeps them out of the way and doesn’t clutter up the throat of the machine. I am right-handed, as is mum. Left-handers may like to try both ways and see what suits you better. Like all my other notes these are just suggestions of things that I find easier and have discovered over many years of quilting, it’s not gospel and you don’t have to treat it as such. Find what is comfortable for you and your machine.

20140522_020324 20140522_020329

Continuing adding your strips, keeping them in order and making sure that you are sewing so that the seams are all on the same side. Always start from the same edge.

20140522_020456 20140522_020500

20140522_020645 20140522_020649

20140522_020900 20140522_020903

Once you have joined the 5 strips, press the seams in one direction.

20140522_021043 20140522_021538

You may notice that the strips are not all the same length.

20140522_021524

This is fairly common and is a manufacturing issue and a washing issue. It’s not something that can be fixed. But if you always start from the same edge when joining strips you will reduce the waste of fabric.

Trim the selvedges off the edge that you started piecing on.

20140522_021514 20140522_021855

Then cut your pieced unit into four 10 1/2in blocks.

20140522_021942 20140522_021947

Repeat for your other sets of strips and you have made all of your blocks.

In the next blog post we will be cutting the focal piece, adding a small border, assembling the quilt top and preparing for quilting.

Mum’s First Quilt

So this quilt-along will be a little different to your usual type of quilting instructions. Mainly because I’m letting Mum take the lead on this one. It’s her quilt and her learning pace, so there’s no rushing and no set timeframe.

Mum works from home for the most part of the week, working in our shared space, the craft room/office. As it’s on the top floor of the house it does get a bit warm but when the sun is around the back of the house first thing in the morning it is quite chilly. Mum decided she wanted to try and make a quilt for herself. Something small enough that she can give it a go without being too overwhelmed with its size, but big enough to drape over her legs while she works on the computer.

So the other night while we watched CSI (Saturday Crime Night) we pulled out every piece of fabric that Mum owns. Which was not a lot as she’s not really a sewer  to the extent I am (read craft hoarder), she used to dabble when my sister and I were little but she mainly painted ceramics and now does cake decorating and some knitting.

Having helped quilters choose fabrics for almost a decade I have created my own process when working with customers who struggle with fabric choice – getting them to tell me little things about the fabrics they’ve chosen so I can work my way through their selections and help nudge them in the right direction – whether that direction be a complete selection or a partial one with more things to find later – and then get the fabrics to speak its design to us.

So Mum’s fabrics were a bit random to say the least. She had a few themes which she’s picked up on but generally it wasn’t a cohesive group of fabrics. We started by dividing them into what groups we could see – blenders, black and whites, brights, small prints (mainly tone-on-tones) and miscellaneous. We also matched up fabrics that worked together, hoping that as we worked through the pile we would find something or enough little somethings that would spark an idea.

Once everything was sorted we stepped back and looked at what we’d done. Mum couldn’t quite see where I was going, she wasn’t really even clear with herself about what she wanted and was concerned that her random fabric purchases and mini raids on my stash had left her with a pile that couldn’t be used.

rsz_20140516_092938

Which is never the case. Because stash diving gives you the opportunity to see what you have (and how much of it), which means you can then either use what you have buying only a few bits to add in or you can see you have nothing that works and buy from scratch. Both are equally good but it all boils down to the timing, the project and your budget.

So I made her pick up the two fabrics that spoke to her the most and explain why they spoke to her.

20140516_025124 20140516_025246

The first one she finds calming, the softer colour palette is peaceful and contains her favourite colours. It’s not too bold but it’s still an interesting print.

The second one reminds her of a storm – the turbulent nature of it, the depth of colours in it and the movement in the print. She loves the strength in the colours but was concerned about matching them.

So we went through the shop’s stock, our local Spotlight and my stash. After trying to match the storm print and coming up with very little that Mum felt matched the vibrancy of the fabric, we ended up with the batik fat quarter and a handful of soft homespuns in matching tones.

Storm FQ and stash matching  fabrics Floral FQ and matching homespuns

The design of the quilt also went through several permutations. Starting with the fact that Mum didn’t want to chop up the fat quarter too much and lose the impact of it. We sketched a few ideas, thinking that we were using the storm print. Mum thought about creating a window effect so that we’d be looking out the window at the storm – cutting it up into four squares to make the window panes – but then we were a tad trapped with that design, not having fabric to see how we could expand on the quilt into the border made it difficult. We thought about doing a colour wash – pulling the four main colours from the storm FQ and working with colour gradation, piecing blocks to surround the FQ, possibly edging it with a narrow border of black to frame it and contrast with it, but it all felt a little off so we changed plans. Again.

Because homespuns are a flat, solid colour you don’t want to use them as a large expanse (unless you plan on machine quilting it with detail, like many Modern quilters do), so for Mum’s quilt we decided on strip piecing blocks and as yet we have yet to decide on the width of the strips and in what direction they will go for each block.

Mum’s quilt is a simple layout. The FQ in the centre, trimmed to a square, with a narrow sashing, the 12 pieced blocks surrounding it, a second sashing and then a border.

Materials list for those who’d like to quilt along:

One feature fat quarter – a print that you can pull the other fabrics from

50cm each of 5 co-ordinating fabrics

2.5m of your border fabric (50cm of this will potentially go with the other five 50cm pieces)

60cm of your binding fabric (we have 4 FQs of this colour for Mum’s quilt)

Backing: will be pieced from remaining fabrics with anything extra needed purchased when we get to that stage

Wadding: this quilt’s estimated size will finish at 1.5m square so you can either purchase a 1.7m square of backing (enough for professional quilting needs) or make up a piece using any scraps of wadding you have in your stash.

Tools:

Sewing machine with 1/4in and walking feet

Rotary cutter, ruler and cutting mat

Neutral thread for piecing

General sewing supplies: pins, scissors, marking pens etc

Note: Mum and I have over estimated on fabrics as I roughly calculated she needed about 30cm of each. As we were buying homespun which is generally anywhere from $5 – $10 per metre it was a more economical way to purchase for this particular quilt. If you would like more accurate quantities please hold off on your purchasing until the next post.

So now that we have all the fabrics and the design set what’s next?

Wash all your fabrics. I’ve discussed this before in this post and this is the only part of this whole process where it is up to you.

Then iron and if you like starch them to return them to pre-washed condition which makes for easier cutting. Purchase starch here.

Note: When you wash fabrics there will be fraying. You will lose some off your edges and be required to straighten them cutting into the amount of fabric needed for your quilt. BUY extra if you feel you will lose too much – 5cm extra purchased can save a whole heap of grief when cutting after washing. This is also spoken about in the washing blog post.

Once you have everything washed and ironed and ready to go meet back here for the second instalment of Quilting Along with Mum.

If you have any questions – such as fabrics choice issues – please feel free to post a photo or video of your dilemma and I’ll help you with that part of the process. You can also email me frankensteinsfabrics@hotmail.com.

Marni x