So the man in the red and white suit will be headed our way shortly (38 days!!) so it’s time for everyone to run around like headless chicken and get gifts, festivities and food sorted out.
I’m here to help 🙂
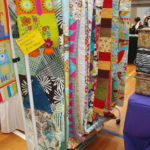
I have pre-made quilts and quilted items ready to post NOW if you head over to my hand-made store. All you need to do is purchase and it will be winging its way to you in no time at all.
However if you have a person to buy for who is crafty I have a few more options –
1. You could purchase a gift voucher which allows them to purchase the goodies they want/need.
2. You could buy them a selection of fabrics/haberdashery and make up a lovely craft pack.
3. If they quilt but never seem to finish any quilts – get them a machine quilting voucher.
During the month of October I will be talking a lot about scrap quilts and UFOs.
I’m a person who likes to get things done BUT because my brain likes to bounce around from idea to idea I do have a box of UFOs that are in various stages of completion and there is more than a few tubs of scraps that I have trouble dealing with.
My aim is to help us all solve some of the scrap fabric problem and to motivate some UFO sewing along the way.
So if you saw my post from a few days ago (read it here) you’ll know where I’m at for one of my stash busting options… That post talks about future scraps…
This post and this coming will be mainly about past scraps – all those scraps currently hiding in tubs and cupboards all around your craft room.
So to get you started here are a few of my suggestions to get you started. I’ll be doing the same so we’ll all be playing along together.
1. Pull out ALL the scraps:
This will help you see everything that you have and give you an idea about just exactly you need to do. Call a friend if you need help, put the kettle on and get sorting. This whole process can be overwhelming so you need to pick your time to sort (or have a friend who won’t take no for an answer) otherwise you will end up with a job half done and getting nowhere fast.
Take your time and plan it. If you think that sorting the whole pile in one hit is too much, try attacking smaller piles to begin with but jump ahead to steps 2 and 3 to make sure as you sort that everything stays sorted.
2. Decide how you want to sort the scraps:
I tend to sort by colour, but I also sort into collections of things (especially if I have an idea when I’m sorting), sort by what suits you. Other options could be theme (novelty, floral etc) or try styles, like country, christmas, pastels, brights etc. Or if you are feeling a tad more adventurous and want to sort them down to the underlying tones in the fabrics try sorting by tonal value or by colour family. You could also sort by size – squares bigger than 4in, smaller than, strips, fat quarters etc.
3. Make sure you have ziplock bags or tubs to pop your newly assorted selections into.
4. Label if you want to – I don’t but I know others who do (check out Dawn’s Colour Labels here) – and stack your tubs or bags in their new home.
Now that you have them sorted you need to find the scrap quilt that you are going to make!
Next we’ll talk about how to select patterns for scraps and UFOs.
If you are anything like me you have scraps tucked into every storage box, bag and tub in your craft room (or tucked away from hubby in secret cupboards) and you dread the thought of dealing with the sheer quantity of it all BUT you cannot bear the thought of throwing it away either.
Short of just bagging the whole lot up without looking at it and dropping it off to your nearest charity (Salvos, Vinnies or if you would like to help Angel Gowns) there’s not much you can do unless you want to spend forever ironing, cutting and piecing scrap quilts, which as much as I love scrap quilts I would prefer to be making things I purposely designed.
I was lying in bed the other night at about 1am, still working online, looking for inspiration, researching and tweaking website when I had an idea. It’s probably not the first time this idea has been had but it will work for my plans and so I’m sharing it with you so that you can find out if it works for you.
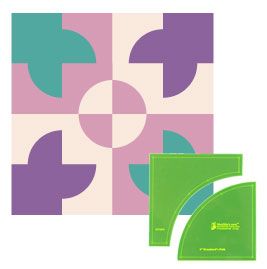
I have decided that every time I piece a project from now on I will cut up what’s left into these 2in Drunkard’s Path shapes. I have always loved DP blocks from the moment I first saw one.
So by the end of 2015 I should have a terrific assortment of tiny blocks ready for my next scrap quilt. I will piece as I go so that the task is not overwhelming and so that I can keep track of how many blocks I have.
If you would like to join in with me on the mini DP block progress you can order your 2in templates from me here.
Of course if you aren’t a fan of the DP blocks you could do something else such as hexagons or clamshells if you love hand sewing. You could even cut small squares!
So nearly at the middle of the year, tax time, 6 months till the end of the year and time to reassess what I’m doing.
At the start of the year I made myself a resolution to finish UFOs. I have done a few, not as many quilts as I would have liked but I have also made inroads to finish other UFOs – runners, bags and other craft stuff that I’ve been working on….
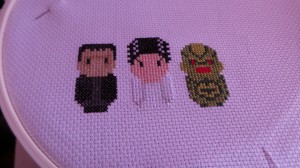
I’m doing a Classic Horror Movie Monster cross-stitch from Cloudsfactory that I bought ages ago but have done barely any on. I’ve done Frankenstein’s monster, the Bride and the creature from the Black Lagoon, next is the Invisible Man, then Dracula, Wolfman and the Mummy. I can’t wait until it’s finished and I can get it framed.
I love cross-stitch but I’m really slow to get things finished – handwork is really not my forté so it takes me three times as long to do.
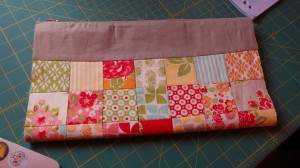
I’ve also been working on using pre-cuts to make a few items. I collect pre-cuts like most quilters do, you pick one up at a show or on sale and it sits in a box or the bag it came in and gets forgotten because you don’t know what to do with it or you struggle with the limitations of the size that its been cut at. I have a jelly roll sitting waiting for me but the project I’m saving that for is something that some friends and I are working on. The other pre-cuts I love at the moment are the mini charm square packs – 42, 2.5in squares – I’ve made a few things with them, but because they are so small its hard to keep coming up with ideas. This is the zippered pouch I’m doing today.
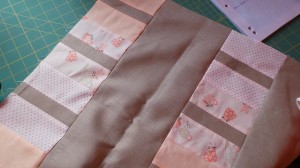
I’m also working on new quilt. I spotted a wreath on Pinterest sometime last year and it was lovely and soft grey tones with brighter peach flowers on it. I loved the colour combination so much I decided that I wanted to make a quilt in those colours. I did start this quilt last year but it has sat in a bag since as I got distracted by other projects. Yesterday I sat and pieced almost all of it and it will be on the quilting machine next week. I’m really looking forward to free-motion quilting something gorgeous in those wide spans of grey linen. YUM!
The move is going well. The new space is nearly cleared out and I’m still packing over at the studio. I’m aiming to be out by the end of the month but it is a little flexible. I really don’t want to muck around with moving as it is such a painful process but it is good in a way because it forces you to declutter and clean things out that you’ve left on shelves and in boxes for far too long.
I’m really looking forward to the new space as it means I can work more to my body’s natural hours. I’m a night owl, its well known that I’m no good in the mornings… 🙂 and because of the new space I am able to teach small classes. Nothing just yet, after mid-July when I’m all sorted, but you can book in now – just email or ring me.
Colour Class – 1.5 hours, $15.
Binding Class – 2 hours, $20, learn several types of binding.
Cutting and Piecing Class – 3 hours, $30, learn about all the tools needed for cutting, how to calculate and cut, then how to piece, press and iron.
Basic Pouch Class – 2 hours, $20, includes inserting a zip.
Basic Table Runner – 3 hours, $30, learn to design and piece a basic runner for your table.
I am located in Gosford so classes are intended for locals or those traveling through the Central Coast. If you are interstate please don’t worry as I can do video classes for you – please PM me if you are interested in those. I’m taking bookings now so if you’d like to secure your place please let me know and I will organise an invoice for a $10 deposit.
Anyways, its another wet and miserable day here on the coast so I’m off to make another cup of tea and get back to my sewing.
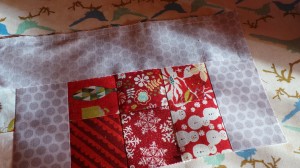
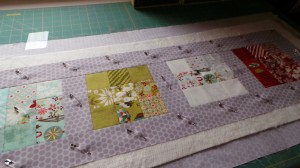
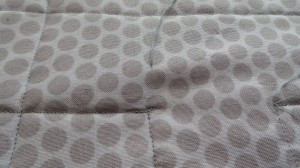
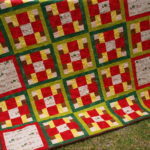
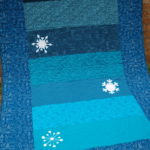
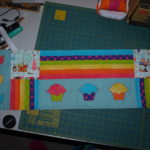
I’ve made this Christmas Table Runner using only a mini charm square pack and just over half a metre of Riley Blake Honeycomb Dot in grey (available in the store).
I know so many people who pick up pre-cuts thinking that they will make something from them, but inevitably they end up in a box or cupboard and don’t see the light of day for a very long time. I know it happens, I’m guilty of it myself. But this year one of my resolutions was to FINISH things and so in an effort to help you out there in quilt-blog-land finish things as well…here we go…
Materials
Aspen Frost mini charm square pack (42, 2 1/2in squares)
To start there’s a few little things that I need to make sure you know so we are all on the same page.
We will not be washing these fabrics. Pre-cuts don’t take well to pre-washing and you will lose more of a 2 1/2in square in fraying than you will have left to sew.
There will be minimal left overs as we will have scraps of the grey and a handful of squares that you won’t use.
Starch is optional but recommended. Starch will help your tiny pre-cuts retain what stability they have and will make your finished blocks easier to handle. Starch washes out. Starch recommendation is Mary Ellen’s Best Press, which you can purchase here.
If you have trouble remembering a layout sequence, make sure you have your camera nearby. Snap a quick picture of the blocks once you are happy with the design so you can refer back to it if needed when you start piecing.
The techniques used in this tutorial can apply to any quilted project you just need to adjust your measurements and design as needed.
Preparation
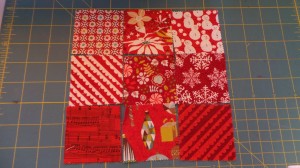
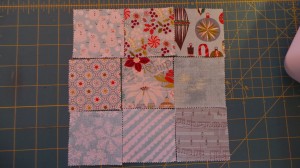
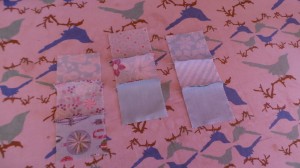
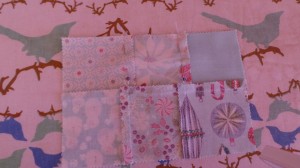
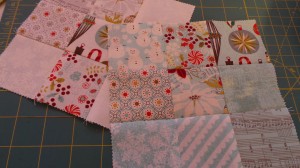
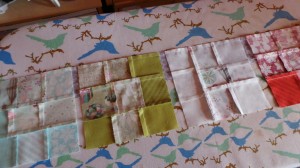
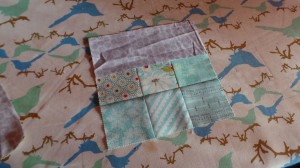
From your mini charm square pack select four lots of nine sets of squares. From the Aspen Frost pack I was able to refine my choice by colour – red, green, blue and white – but whatever pack you have you need to make that judgment call. It could be by print, scale, theme, directionality* etc.
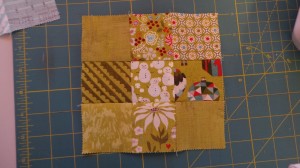
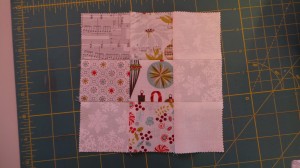
Layout your nine squares in a 3×3 block that you like. Take a photo for reference if needed. See note 5.
Thread up your machine with neutral colour thread (cream, white, black, grey) and your 1/4in foot. Set the machine for straight sewing, with average stitch length and width. My Janome likes a stitch width of just over 5 and a length of 2.
9-Patch Blocks
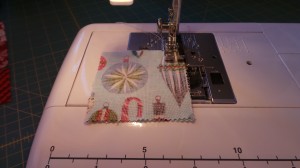
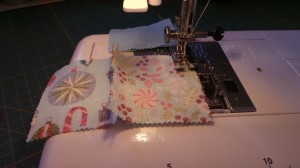
Take two of the mini charm squares and place them right sides together. Stitch the squares together down one side. Without taking the stitched squares off the machine continue piecing all the pairs of squares that you can from each block (this is where the photos of the blocks will help). Once you have stitched the pairs (12 pairs) you can remove the strand of pairs off the machine. This is called chain piecing** and saves time and thread.
Starting with the first of the stitched pairs go along and add the third square for that row.
Once you have joined the rows of three squares, take everything over to your ironing board, bring your scissors or thread snips.
Snip the threads holding each row together. Set the three rows for one block face down on the ironing board. Check that you have them in the right order (use your photos) and press the seams in alternating directions.
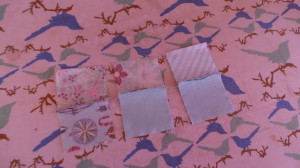
Taking two rows align the seams as shown. This is called abutting*** the seams and will ensure that you have better matching points. This technique can be used anytime you have two seams meeting.
Pin the two rows together making sure you have the seams matching.
Stitch along the edge, remove the pins and check you intersecting seams. Press the rows open and then repeat the process for the third row of that block.
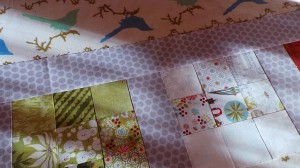
Assemble all 4 of your 9-Patch blocks.
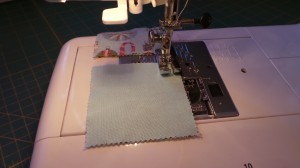
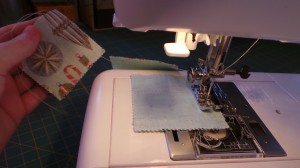
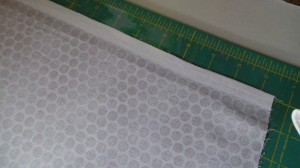
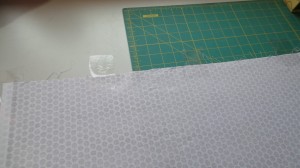
From your 55cm of grey fabric cut three, 2 1/2in strips.
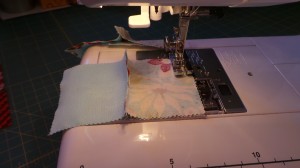
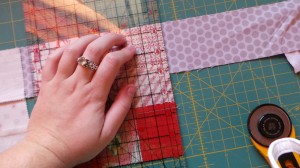
Place your 9-patch block right side down on the right side of one grey strip and stitch along the edge. Attach all four blocks onto the strip in this way
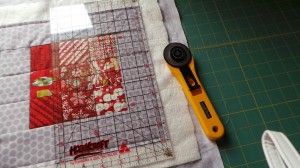
Place the pieced strip down on your cutting mat as shown in the picture and trim the blocks/strip down to size.
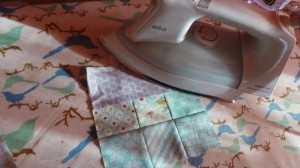
At this point I like to spray starch my blocks to aid in keeping them straight and neat, it also helps press out the strips that I’ve just attached to the centre blocks.
Set the seams and then press the strip away from the block.
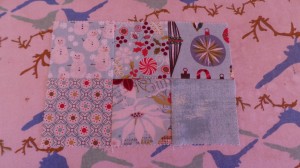
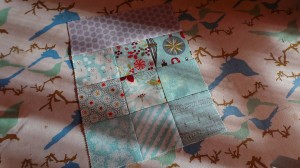
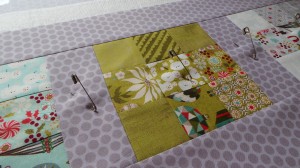
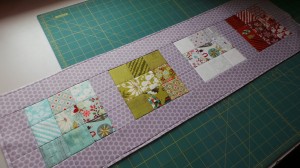
Layout your blocks in the order you want them in.
Piece the blocks together making sure there is a strip of grey in between each block. You can piece one by one or piece in pairs and then piece the pairs together.
Make sure you have a strip of grey on either end of your table runner length as well.
Trim down any excess grey fabric and press the seams you just stitched in towards the grey strips. Turn the runner over and press from the front to make sure there are no pleats in your seams.
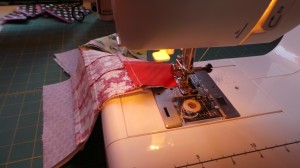
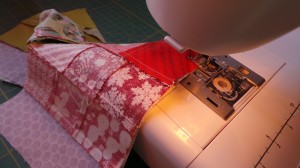
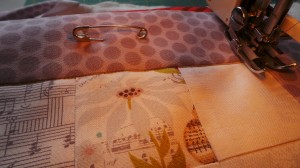
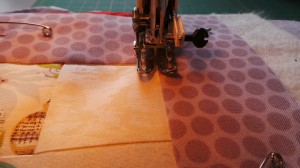
Take one of the remaining grey strips and place it right sides together with your runner, and stitch along the length. Pin if you feel you need to.
Trim the excess fabric strip and then set the seam.
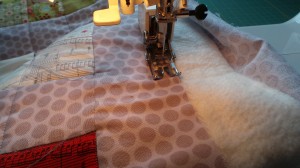
Starch the strip and then press it away from the centre of your runner.
Repeat for the other grey strip and your runner top is finished!
Basting
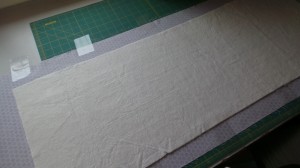
Press your remaining grey fabric (approx. 35cm). Starch if you like.
Lay the fabric right side down on a flat surface. Tape the selvedge edges down and then tape at intervals along the length, making sure the fabric is taut but not stretched.
Lay your rectangle of wadding on top of the fabric and smooth out so its flat and there are no lumps, wrinkles or loose threads.
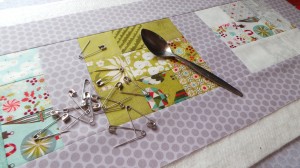
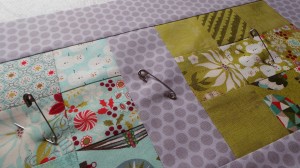
Place your table runner right side up on the wadding and smooth from the centre out so there are no lumps or folds.
Pin baste with safety pins, no more than 4in apart. If the pins hurt your hands to close them – use a teaspoon.
Set your sewing machine up with your walking foot. You can increase your stitch length slightly, I tend not to but it does make it harder to unpick if you have a small stitch when quilting. Test a few sizes to find one you like.
Quilting
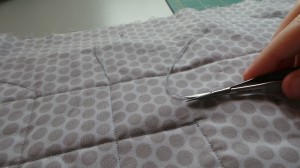
I quilted this runner in straight lines – ditch stitching in each of the 9-Patch blocks and then ditch stitching the rows and extending it out onto the border. I also did a 1/4in stitch away from the edge of the border to secure the whole runner edge to make binding easier.
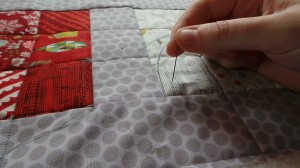
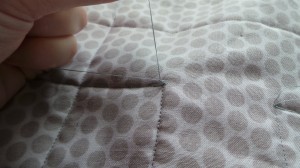
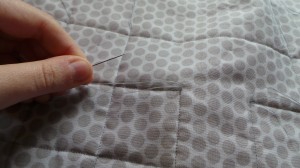
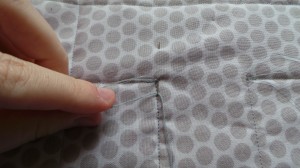
To tie in the loose thread ends – from the top of the runner thread the ends onto a needle and pull through to the back of the runner. Tie the threads in a knot and let the knot sit about 1/8th of an inch away from the runner surface. Thread all four threads on to the needle and thread into the runner and away from the stitches, hiding the threads and the knot inside the runner. Wiggle the knot so that it slips under the fabric, if you need to. Clip off the excess thread.
Trim down your backing and wadding to the edge of the table runner and you are ready for binding.
Scale: The size of the print – small, medium, large.
Print: Floral, dots, stripes, scrolls etc
Directionality: Stripes, text, arrows
**Chain piecing
Piecing by means of continuing to sew without stopping. Piecing everything that needs piecing before you need to stop and press, cut or attach the next section
***Abutting the seams
Also known as nesting the seams. Making sure that the folded part of each seams is ‘butted’ up to the next seam so that they sit as flat as possible and reduce bulk.
The other day I was fortunate enough to see this link that a friend (also a quilter) posted on her FB page.
I read it with interest, agreeing with some points, recognising that I could adjust my own view on others.
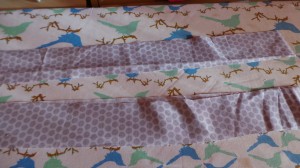
But one thing has struck me since reading this blog and that is if you piece a backing PLEASE piece it with the same care and attention to detail as you would the front.
Backing is important regardless of your view on it because it will be important to the overall finish of your quilt. Whether it gets professionally quilted on a long-arm or a DSM it doesn’t matter but how the backing sits is a key point in making sure your whole quilt looks its best.
I’ve often found there are several schools of thought on backing. I myself fall into the first category.
1. The ‘Match the backing’ club: This group wants the backing to match the front in some way. Using up the leftover fabrics from the front or matching it with another fabric altogether. This group often consists of Modern quilter’s with lovely pieced backings, those who like symmetry and those who like to use what they bought for that project.
2. The ‘it’s only backing’ club: This group seem to not worry about matching – theme, colour or style – they pick up cheap backings whenever they see it and whatever takes their fancy at the time a quilt is finished, it goes on as backing.
3. The ‘I’ll use something plain’ club: This group use primarily homespun, calico, quilter’s muslin or a very plain wide back. This group is rare. I hardly see any quilts like this anymore.
There is nothing wrong with any of the above ideas for backing. I’ve used all three types over the almost 300 things I’ve quilted over the last decade BUT the one thing that has been the same is that whenever I piece a backing it’s done with care.
Because a backing needs to be attached in a certain way to the ‘leaders’ (the fabric attached to the roll bars on a long-arm frame) it needs to be as accurate as you can make it. As a quilter I have seen many backings – some have come to me off the roll, some cut to size and some pieced – off the roll is best for less changes to the nature of the fabric as I can pin the straight selvedge to the top leader and adjust the bottom one as necessary. Cut to size is problematic as cutting it to size often results in too small, or it shifts during quilting and then one side has less, the bottom doesn’t make it all the way, corners are way off…. Pieced backings cause issue, because lets face it a seam creates a weak spot – seams undo themselves, seams might not be straight and seams may have been stitched incorrectly causing rippling.
So in order to solve these problems –
1. Off the roll: Where you can, leave a selvedge for the top edge of your backing. Talk to your quilter about it and if needed mark it as the top of your backing.
2. Cut to size: Backing for many long-arm quilters needs to be at the barest minimum 4in extra ALL the way around a quilt top size. This is mentioned in the link above. I would say 6in to be safer and 8in if you are getting dense quilting done. Please don’t cut backing ‘to size’ because it just won’t do. If you intend on machine quilting on your own domestic machine then cutting to size can be preferable as it reduces bulk BUT if you change your mind and want it quilted on a long-arm please piece some extra around your backing – an extra strip of homespun, or the like to help us get your quilt onto the machine – or rethink your backing altogether and start again.
3. Pieced backings: Lay your quilt top out flat and measure it. Use those measurements and then add your 4-8in all the way around. Draw up on graph paper your backing dimensions and then work out your piecing from the outside edge in. (Craftsy have a really good class on modern quilt backings with Elizabeth Hartman called Creative Quilt Backs, this may help with your backings if you have trouble). Piece your backing together as carefully as you would the front, taking the time to press as you go and run a row of stitching all the way around the edge of the backing to prevent seams unravelling. Use starch if you like and make sure all threads are trimmed away. Above all don’t rush, I know it’s exciting being nearly done or nearly ready to quilt but don’t rush your backing.
If you are sending your quilt away to be quilted make sure everything is pressed, trimmed and stitched securely so that it can handle any jostling while it travels to the along-arm quilter. Be clear with what you want for your quilt, discuss your options with the quilter and make sure you get anything you need in writing. I use an invoice book when I’m booking in a quilt, I write down the size, price, batting, backing, thread, design and due date (timeframe if the quilt is needed by a certain date: birthday etc). My customers pay a deposit and then the balance when the quilt is picked up. So the deposit amount and date is also included on the paperwork. Other things that we quilters look for when booking in your quilts are things like – do you want the quilt trimmed down ready for binding, do you want us to attach the binding, make the binding, are there labels that need to be quilted on as well?
There’s many things that need to be thought about in the process of making a quilt but if you trust in your long-arm quilter, their experience and talent you will have a finished quilt to be very proud of.
If you would like to know more about long-arm quilting you can check out the machine quilting page, email me frankensteinsfabrics@hotmail.com, ring 0416 023 637 or comment on this post.
Watch this quick video to see the machine in action
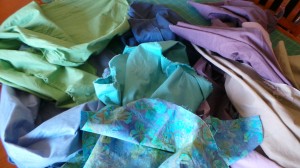
After washing all of your fabrics, iron and starch them.
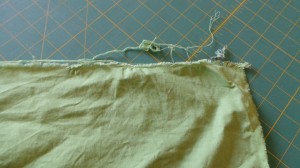
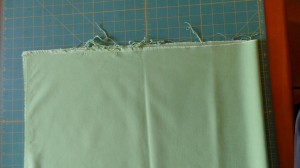
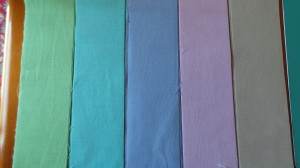
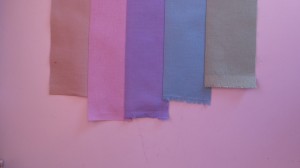
This is how much fraying and threads that happened when we washed these homespuns, we lost just under 3/4in on this green fabric and the others lost about the same but none more than an inch. This is why I urge you to consider buying extra fabric to save you the grief and hassle of going back and buying more fabric.
Watch this video for using starch.
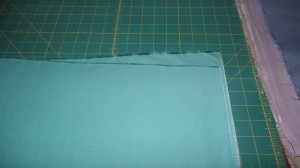
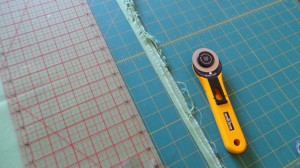
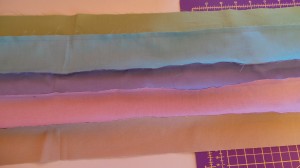
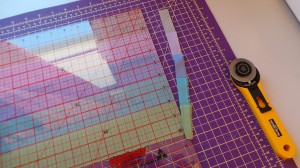
Fold your fabrics in half with wrong sides together, selvedges aligned. You may need to allow the fabric to dictate to you where the fold is, which may pull the selvedges out of line but they will be cut off so don’t worry too much. Your selvedges will not match up – in the photo below you can see the teal fabric selvedges are way off – this is due to two things, washing and grain line. When we washed our fabrics they have shrunk, we removed the sizing that was keeping them nice for the shelves in the shop and the grain line has been ‘relaxed’. By adjusting the position of the selvedge when folding your fabric in half for cutting you will get a much better and more natural grain line and it will be straighter.
Trim off the frayed edge to straighten up the fabric. If you are left-handed you can continue cutting as the fabric is laid out in the right position for you. Right-handers turn the fabric’s newly straight edge to the left-hand side of your board and then continue cutting.
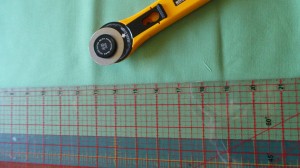
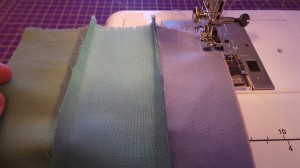
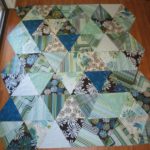
From your five fabrics (50cm pieces of homespun in the materials list) cut three 2 1/2in strips.
Note: the remaining fabric will be used to piece the backing for Mum’s quilt, you can choose to do the same if you wish.
Set up your sewing machine with the neutral thread for piecing, the 1/4in foot and a straight stitch that is the average for your machine – check your manual for tips on this. My Janome likes a stitch width of 5.5 and a length of 2.
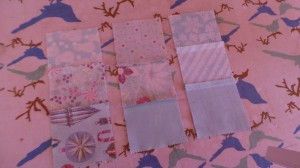
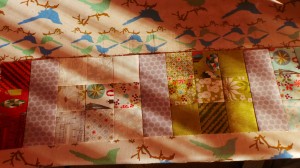
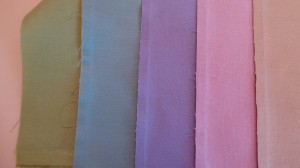
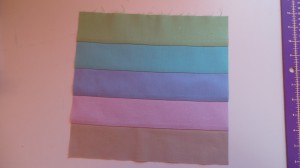
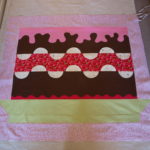
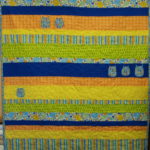
Piece the strips together in the sequence of your choice. This is the sequence we have chosen for mum. There is reason behind it, it’s not just random. If you paint put your mind into that way of thinking, but I will explain.
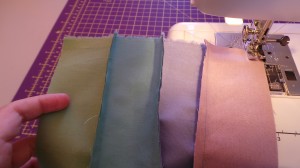
1. Green is on this end because it has a yellow base colour and is essentially the odd one out in this range of colours.
2. Teal is next because it is made up of blue and green so it can sit nicely next to green to help tie it into the block.
3. The blue is in the middle as it is the darkest fabric and will draw the eye in, but it is also there because it is blue – the teal has blue in it so they can sit next to each other, and the blue also is used in making the colour for the next strip so it is tying the two sides of this block together.
4. Purple has a red base (mix red and blue together to make purple) and so this is why it’s next to the blue.
5. Brown is often classed as a red based colour so it belongs next to the purple for this reason. It is also technically an odd one out so it is also balancing the green’s oddness on the other side.
Piecing
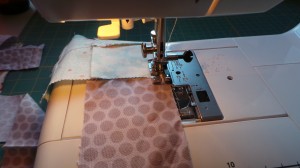
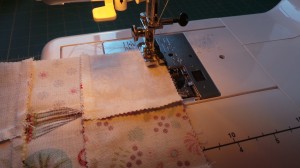
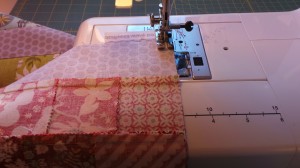
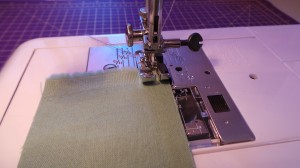
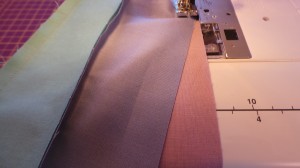
Start with the green strip and place it on top of the teal strip. Pin if you feel you need to hold the strips together.
Note: I like to sew my strips together so that as they are being joined so that they are off to the left side of the machine – this keeps them out of the way and doesn’t clutter up the throat of the machine. I am right-handed, as is mum. Left-handers may like to try both ways and see what suits you better. Like all my other notes these are just suggestions of things that I find easier and have discovered over many years of quilting, it’s not gospel and you don’t have to treat it as such. Find what is comfortable for you and your machine.
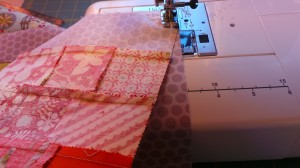
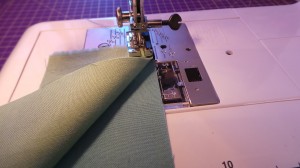
Continuing adding your strips, keeping them in order and making sure that you are sewing so that the seams are all on the same side. Always start from the same edge.
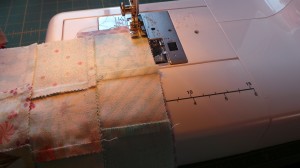
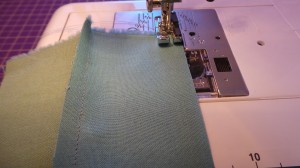
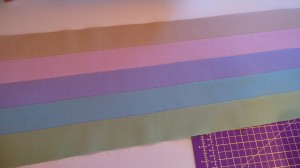
Once you have joined the 5 strips, press the seams in one direction.
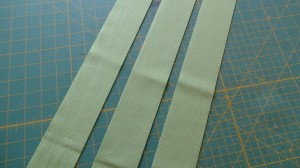
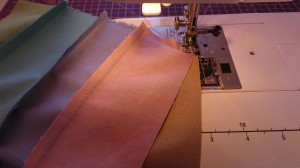
You may notice that the strips are not all the same length.
This is fairly common and is a manufacturing issue and a washing issue. It’s not something that can be fixed. But if you always start from the same edge when joining strips you will reduce the waste of fabric.
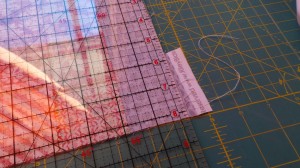
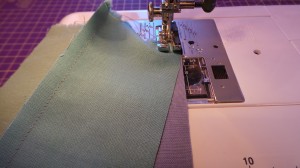
Trim the selvedges off the edge that you started piecing on.
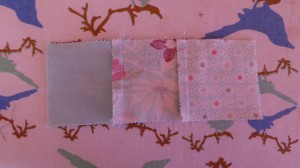
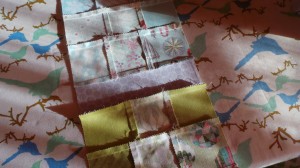
Then cut your pieced unit into four 10 1/2in blocks.
Repeat for your other sets of strips and you have made all of your blocks.
In the next blog post we will be cutting the focal piece, adding a small border, assembling the quilt top and preparing for quilting.
Part of a blogger’s duty to her readers is to occasionally divulge a bit of information about her life. I’ve done that with things like what happened with Dad, birthdays and a few other bits and pieces but I feel like you should know ‘me’, know odd little things about Marni. I like to think that I am friends with my customers – whatever varying degree of friendship that may be, we are all different and that’s a good thing but we don’t have to be everybody’s BFFs and live in each others pockets.
So what I’d like to do is open up the comments below this post to you – ask me something that you’d like to know (keep it reasonable, but I will reserve the right to not answer some things), I am pretty open about most topics.
So here is a little confession of one of my many, many quirks…
I love goats. I’ve always wanted a pet goat. They just appeal to me for some unexplainable reason that seems to baffle and bemuse my friends and just quietly I think it stresses out my mother…
I am a Capricorn which may explain the initial attraction as I dabbled with all of that astrology stuff throughout high school. I love the glorious drawings and artworks that people create, showing the mystery and fairytale nature of our birth signs. So I guess I was going to head towards a goat from the start.
I even have a pinterest board dedicated to them and their cuteness.
I love their cute faces, weird eyes and cheeky nature. If I had room (read farm) I’d have a whole bunch of them along with every other animal I’ve ever wanted to own (Clydesdales, ducks, a heap of cats and maybe an Alpaca or two). People think I’m nuts because it isn’t a normal pet to own, but I don’t care.
I’ve even started to collect a few goat knick knacks.
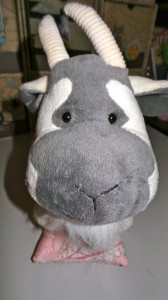
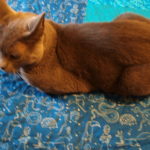
Below is Greycliffe. I used to work at Craft Depot at Pennant Hills and one day I was taking the mail orders over to the Post Office. While I was waiting in the queue I glanced over at the sale bin they kept near the front and it was full of toys. Reached out to see what the quality was like and as I lifted the top toy off the pile, there he was. His little beardy face staring up at me and I knew he’d be coming home with me. The poor lady at the counter thought I was a bit odd as there were much cuter more normal (there’s that word again) toys in the bin and why would I want a goat one?
He now lives in my bedroom along with Koala who is my childhood toy – one given to me by my brother when my sister was born so I didn’t feel left out. I think that was the start of my koala obsession. 🙂
Then I have Gilly who lives on my craft room desk.
Gilly is the tiniest ceramic goat I ever did lay eyes upon. She was purchased for me by my friend Ellie while we were away on our annual Stitch & Bitch Brigade’s Stitchmas in July holiday. We traveled to Blackheath for a weekend away. The group of us (9) rented a house for the weekend, ate, drank and crafted. We went into town and shopped, lunched at cafes and then stopped at the tea house where Gilly was to be discovered.
I love these weekends away with the girls – they are a mix of friends – Susan is my oldest and dearest friend from kindergarden, Fi, Alison, Dimity, Nicola, Jocelyn and Camille are friends of Susan’s that I’ve appropriated and Ellie was my plus one. There are more of us in the S&B Brigade (53 in total) but we don’t all go away together. I am not a part of a guild or quilting group. I’ve always been a bit of a crafting loner, the lone wolf really… I don’t crave social interaction while I’m crafting like many quilters do, it’s just not in my nature.
Anyways, along with Gilly I also purchased a small grey and white cat because… well… cats…
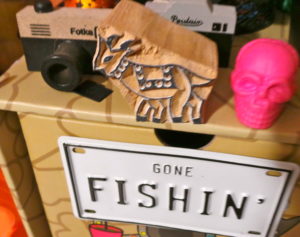
The last piece in my goat collection is this stamp.
I picked this up from the craft show last year at Darling Harbour. Cecile from Unique Stitching had these in a sale bin on her stall and there just was NO way I was walking past this goat. I was only buying felt from her (lovely luscious felt) as she stocks bamboo felt which is great for me because when I want to make felties I want to use good felt. I’m allergic to wool so can’t use the really good stuff and the acrylic sheets pill and fluff up too much for a good finish on a feltie. But now that I’ve tried the bamboo that’s all I will use. It’s perfect in every way except for 2 small things – it costs a little more, but so worth it and that it doesn’t come in the large selection of colours that the acrylics do. But time will fix both of those things and I will be using it regardless.
I’d like to collect more goat things but for now these are enough. My mission at the moment is de-cluttering my life. We are drowning in stuff on this planet and it’s just not practical.
So ask below, what you would like to know about me, as I am the person you trust for fabrics and other quilting paraphernalia and you have the right to know who I am and what I’m all about. 🙂
I cannot wait to reveal all the amazing things that I have in store for FF HQ this year.
It’s been 16 months since Dad became ill and the trauma threw our lives into disarray, but we coped, learned and are all the stronger for it. Yes things had to change in order for our lives to work on a daily basis, this included shutting the store front, but it has made life much more flexible and easier to manage all round for us all.
So to the new year and new things!
This year will be Year of the UFO – I have a tub full of quilt tops that need to be finished. I will be keeping a list and I’d like to invite you all to join me in this.
And so here we stand a mere week out from Christmas 2013.
I’m not quite sure I believe we got here as fast as we did – it really does seem like a blur. Especially since we had so many big things happen in the last 12 months –
– The shop front closing and the restructuring of the business
– Dad being home for more than a year!
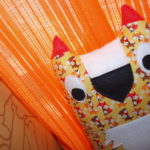
– New directions with the 55 Fox Fiasco
– And all the other random good stuff that happened.
Also in that time I started a new job… I’m doing some freelance work for the College of Law which is the complete opposite of the work I do in the shop. I’m working on word documents, behind a computer all day, not behind a sewing machine. My brain is finding the balance a little hard to come to terms with but the work is important as it is legal information for up and coming law students.
Nothing will take me away from the shop permanently, I’m just doing this job to help them through their busy time as I have the necessary skills and the flexibility with my time. 🙂
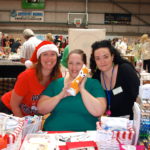
So to catch you all up with what’s happened since I last posted a blog entry (eep! the 21st of October) here’s a quick montage of pics –
I think that about covers the majority of what happened.
I’m not closing over the holidays – so if you need anything please feel free to ring, email or place your order through the shopping cart. I’ll only be going to the post office on non-public holiday days so please allow a couple of extra days for your deliveries.